

Most furniture damage doesn't happen because someone forgot bubble wrap. It happens because the move was rushed, access wasn't checked, the wrong materials touched the wrong surface, or the truck load wasn't secured properly. On the Central Coast, we also deal with coastal humidity, steep driveways, apartment lift rules, and narrow approaches that can turn a simple carry into a risky one.
If you're working out how to protect furniture when moving, start with planning, not packing. A clean table wrapped the right way will still get damaged if it has to be forced around a tight stairwell in Newcastle or sits in a truck with a loose load on the run to Sydney. The good news is that most of this is preventable with the right sequence, the right materials, and a realistic view of what should be handled by a professional removalist.
In NSW, there were over 1.2 million household relocations between 2021 and 2024, and furniture tip-over and impact injuries during moves contribute to 2,800 emergency department visits annually. The same data notes that sofas are the most commonly damaged item at 34%, followed by dining sets at 11%, which is why preparation matters before anyone starts lifting (furniture protection planning data).
Your Pre-Move Checklist for Furniture Protection
The best protection starts a week or two before moving day. If you're relocating from Terrigal to Newcastle, or from a Gosford unit into a Sydney terrace, your biggest advantage is knowing exactly what you're moving and what the access looks like at both ends.

Start with an inventory that means something
A proper furniture inventory isn't just a list that says "table, sofa, bed". Write down the material, condition, dimensions, and whether the item comes apart. If a dining table already has a mark on one edge, note it. If the buffet is solid timber and the drawers are heavy, note that too.
This does two things. It helps your removalist plan the load properly, and it helps you decide what needs special wrapping, disassembly, or insurance attention.
A simple checklist should include:
- Item type and room. Keep each piece tied to a room so unloading is quicker.
- Measurements. Height, width, depth, and any parts that protrude such as legs, handles, or headboards.
- Condition notes. Existing scratches, weak joints, loose legs, or delicate finishes.
- Access notes. Stairs, lifts, tight turns, shared corridors, and parking limits.
If you haven't already sorted your broader move admin, it's worth pairing this with a practical moving-in checklist so furniture planning doesn't get separated from keys, utilities, and building bookings.
Clean every piece before you wrap it
This step gets skipped all the time, and it shows later. Dust, grit, and crumbs trapped under wrapping act like sandpaper when furniture is carried, stacked, or vibrates in transit. For timber pieces especially, a clean surface gives your protective layers a better chance of doing their job.
Use a soft cloth and the right cleaner for the surface. Let everything dry properly before wrapping. Damp furniture sealed too early is asking for trouble, especially in Central Coast coastal areas where the air already carries moisture.
Practical rule: If a surface isn't clean and dry before wrapping, don't wrap it yet.
Measure the path, not just the furniture
People measure the couch and stop there. You also need the front door, hallway turns, stair width, lift depth, ceiling height on landings, and the approach outside. A sofa that fits through your current doorway might still fail at the new place because the stairwell is tighter or the lift door opens onto a sharp turn.
This matters in older Newcastle apartments, Sydney terraces, and some Lake Macquarie homes with split levels or narrow side access. It also matters in strata buildings where you may need to book the lift, protect shared walls, and move only within certain hours.
Check these before moving day:
- Building access. Lift bookings, loading dock access, strata rules, and body corporate notices.
- Street conditions. Parking restrictions, school zones, narrow streets, and whether council permits are needed.
- Property protection. Floors, door frames, stair rails, and shared common areas.
- Weather exposure. Rain, salt air, and how long furniture may sit outside during loading.
Plan the order of work
The safest move is usually the most organised one. Start with items that need disassembly or custom wrapping, then clear pathways, then stage furniture by room. Don't leave furniture scattered through the house until the last minute.
For apartment relocations, timing matters as much as wrapping. If the loading zone in Sydney is only available for a short window, or the building manager in Newcastle wants all common areas protected before the truck arrives, your whole furniture plan needs to reflect that. Reliability matters here. When a team turns up on time and knows the access conditions, damage risk drops because no one is rushing.
Choosing and Using the Right Packing Materials
Materials matter, but using them in the right order matters more. The wrong layer against the wrong surface can create marks, trapped moisture, residue, or pressure points. Good furniture protection isn't about wrapping everything in plastic until you can't see it. It's about matching the material to the item.
A 2022 report from the Moving Industry Association of Australia found that using professional quilted pads and moving blankets reduces furniture damage by 67% (quilted pads and blanket protection data). That's why professional kits look repetitive on purpose. Quilted pads, paper, felt, stretch wrap, foam, edge protection, and proper tape each have a job.

What each material is actually for
Old sheets and beach towels are better than nothing, but they slide, bunch up, and don't absorb impact well. Professional packing materials are designed to stay put and spread pressure more evenly.
Here's the basic toolkit we rely on:
- Quilted moving blankets. These are your main impact layer for timber, painted finishes, and large furniture panels.
- Acid-free packing paper or breathable felt pads. Best for direct contact with wood before the blanket goes on.
- Stretch wrap. Good for holding blankets in place and keeping drawers or doors closed. It should not sit directly on delicate timber finishes.
- Bubble wrap or foam. Useful for glass, glossy sections, legs, and vulnerable detail work.
- Cardboard corner guards and edge strips. These protect the spots that get hit first in doorways and truck loading.
- Painter's tape or quality packing tape used over wrapping. Tape should secure the outer materials, not stick to polished timber or upholstery.
If you're sourcing some materials yourself, fitted durable furniture covers can be useful for keeping dust and general grime off upholstered items during loading and short-term storage. They're most useful when they're paired with padding underneath, not used as a substitute for it.
What not to use
A lot of damage comes from well-meant shortcuts. Newspaper can transfer ink. Duct tape leaves residue and can pull at finishes. Rope can bite into edges and shift under tension. Thin blankets don't protect corners when a piece bumps a brick step or truck wall.
The biggest mistake in coastal NSW is wrapping timber in direct plastic contact and leaving it there. In humid conditions, trapped condensation can do more harm than the journey itself.
Plastic is for securing the outer layer, not for touching a vulnerable finish.
A coffee table wrapped the right way
Take a standard wooden coffee table headed from The Entrance to a unit in Newcastle. It looks simple, but it has all the common weak points: corners, legs, underside joints, and a top surface that shows every mark.
Start by cleaning it thoroughly and making sure it's dry. If the legs come off, remove them and bag the hardware. Wrap the top first with breathable paper or felt pads. Then reinforce the corners with cardboard guards.
After that, add moving blankets. Use enough coverage so there are no exposed edges. Secure the blankets with stretch wrap around the outside. Keep the wrap firm enough to hold the blankets but not so tight that it presses hard into the corners or drags across the finish.
A quick sequence looks like this:
- Clean and dry the table
- Remove detachable legs if possible
- Protect the surface with paper or felt
- Add corner guards
- Wrap with quilted blankets
- Secure with stretch wrap around the blanket layer
- Label parts and hardware clearly
For people who'd rather not buy everything outright, some removalists offer packing materials, box hire, and wrapping as part of the move. We provide packing materials and refundable-deposit moving boxes as one option, which can make sense if you don't want to overbuy supplies for a one-off relocation. If you're comparing options, this guide to packing materials for a damage-free move is a useful place to start.
Match the wrapping to the route and conditions
A single-level move in dry weather is one thing. A coastal move with sea air, stop-start traffic into Sydney, and furniture waiting in a loading bay is another. In those jobs, breathable layers and timing become more important than piling on extra plastic.
If rain is likely, stage wrapped furniture inside as long as possible. If storage is involved, use covers that keep dust off without sealing moisture in. If the route includes stairs, reinforce the lower corners and handhold areas because those take the most friction during carrying.
A Guide to Furniture Disassembly and Reassembly
Large furniture often gets damaged because someone tried to save ten minutes. They leave the bed assembled, keep the dining table legs on, or decide the bookcase will "probably fit" if it's tilted just right. That's when joints strain, walls get marked, and someone ends up carrying too much weight in the worst possible position.
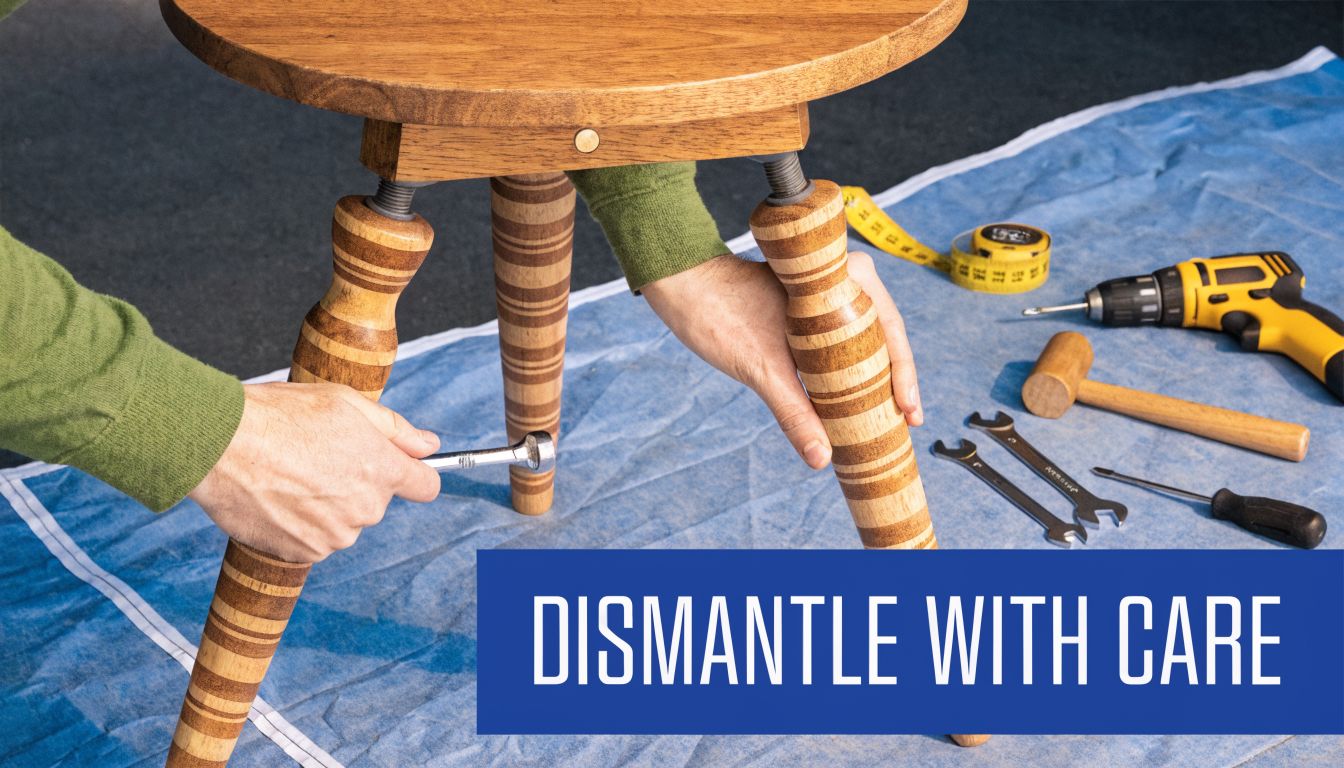
Data from the Australian Furniture Association shows that proper disassembly can cut the risk of damage by as much as 52%. It also makes tight access points safer to manage, which is exactly what you want in a Sydney terrace or on a narrow internal staircase.
What should usually come apart
Beds are near the top of the list. Headboards, slats, side rails, and legs travel better as separate components. Dining tables with removable legs should nearly always be taken down. Modular sofas, tall shelving, desks, and most flat-pack furniture are safer when broken into stable sections.
Some pieces don't need full disassembly, but they do need parts removed. Drawers, glass shelves, mirrors, loose tops, and decorative panels should come out before carrying starts.
Pieces that usually deserve a second look include:
- Bed frames and bases
- Dining tables
- Modular lounges
- Tall bookshelves
- Desks with returns or hutches
- Wardrobes that break into sections
- Any item with long legs or weak joints
A safe system that actually works
Disassembly goes smoothly when you treat it like a small project, not a wrestling match. Set up a protected workspace with a blanket or pad on the floor. Keep tools, hardware bags, labels, and your phone handy.
Take photos before you undo anything. Get one full shot and a few close shots of brackets, bolt positions, and how panels line up. Those photos save time later, especially if reassembly happens after a long day on the road.
Use this sequence:
- Photograph the item assembled
- Remove loose and fragile parts first
- Take apart one section at a time
- Bag hardware separately for each item
- Label every bag clearly
- Wrap each component before stacking it aside
Don't toss screws from different items into one tub. That's how reassembly turns into guesswork.
On-site habit: Label hardware by item name and location, such as "queen bed headboard bolts" or "desk left return screws".
Don't force furniture through tight spaces
Many instances of damage arise from scenarios like these. A sideboard catches a corner, someone rotates too late, or a table gets wedged halfway through a stair turn. Once force enters the job, finish damage and joint stress usually follow.
In older suburbs around Sydney and Newcastle, you also have to consider rail height, decorative plaster, tight landings, and doors that don't open fully because of wall placement. Taking a piece apart often protects the furniture and the property at the same time.
For a visual walkthrough of the basic process, this short video shows the kind of methodical approach that prevents damage during disassembly and setup:
Reassembly needs the same care
People often relax once the truck is unloaded. That's a mistake. Reassembly done on hard floors without padding can mark panels before the item is even back together.
Lay down a clean blanket, check all hardware against your labelled bags, and build the item in reverse order. Tighten fixings evenly rather than locking one side fully before the other. If a joint doesn't align naturally, stop and check your photos. Forcing a bolt into a misaligned hole can split veneer, strip hardware, or throw the frame out of square.
If you're moving furniture with age, sentimental value, or previous repairs, slower reassembly is worth it. Those pieces often look sturdy until fresh pressure hits an old repair point.
Protecting Special Items Antiques, Upholstery and Pianos
Special items need a different mindset. You're not just trying to stop knocks and scratches. You're managing finish sensitivity, fabric wear, moisture, balance, weight distribution, and sometimes family history.
A cedar sideboard handed down through generations shouldn't be treated like a modern flat-pack unit. A new lounge in cream fabric needs a different wrap than a leather armchair headed into storage. And a piano isn't just heavy furniture. It's a large, delicate instrument with awkward weight and vulnerable internal parts.
Antiques and timber pieces in coastal conditions
On the Central Coast, humidity changes the job. Timber responds to moisture, especially older furniture with veneer, shellac finishes, or fine joints. For wooden antiques, direct plastic-to-wood contact has been linked to 30% of mildew cases in humid coastal climates, and unclean surfaces are a factor in 40% of surface abrasions (upholstery and timber preparation guidance).
That means the first layer matters. Use breathable paper or felt pads against the surface, then blankets over the top. If the item has ornate legs or carved edges, pad those separately instead of relying on one outer wrap to do everything.
A family heirloom chair moving from Avoca Beach to Lake Macquarie might only spend a few hours in transit, but if it's wrapped tightly in direct plastic on a muggy day, you've created a moisture trap. That's avoidable with the right materials and enough airflow between surface and outer wrap.
Older timber pieces usually need less sealing and more breathing.
Upholstery needs clean handling and shape protection
Sofas and armchairs get damaged in quieter ways. Fabric picks up grit, arms get compressed, skirts catch, and sharp frame corners underneath can rub through wrapping if the item is dragged or stacked badly. Preparation matters because overlooked dirt contributes to 35% of post-move cleaning claims in the same guidance linked above.
Vacuum first. Check for loose threads, existing wear, and weak seams before anything is covered. Then use a breathable cover to keep off dust and general grime. Over that, place moving blankets on pressure points such as the arms, back, and base.
For a newer sofa headed from Erina into a Sydney apartment, I'd want to know three things before wrapping starts:
- Will it need to stand on end in a lift or hallway
- Are the legs removable
- Will it wait in a loading bay or on the kerb before truck access opens
Those details change how much reinforcement the corners and base need. A lounge that stays upright in a wide suburban house move is one thing. One that has to pivot through a heritage apartment entry in Newcastle needs much tighter planning.
Pianos are a separate category
Pianos combine awkward dimensions, concentrated weight, polished surfaces, moving parts, and serious injury risk. Even a short move across the room can go wrong if the path isn't level and controlled. On stairs, ramps, or wet driveways, the margin for error gets very small.
The issue isn't only the finish. It's balance. Weight sits unevenly, and once a piano starts moving the wrong way, you won't stop it by grabbing harder.
If you own one, use a specialist. We cover the key considerations in this guide to hiring a piano mover, including access planning, surface protection, and why general DIY lifting gear usually isn't enough for the job.
Safe Loading and Securing for a Damage-Free Transit
The truck is where good wrapping gets tested. Furniture doesn't get damaged only because it was under-protected. It gets damaged because the load moves. Every turn, brake, incline, and pothole adds force, and those forces travel through whatever is touching.
A 2024 survey from the Moving Industry Association of Australia found that 55% of furniture damage during relocations is caused by unsecured loads shifting in transit. That's why loading isn't just the final step. It's the point where the whole protection plan either holds together or fails.
The truck has its own logic
A professionally loaded truck isn't packed randomly from floor to roof. It has a stable base, balanced weight, protected gaps, and secured tiers. Heavier items create the foundation. Lighter and more delicate pieces sit where they won't be crushed or rubbed.
Think about a run from the Central Coast into Sydney. You might have motorway speed, then stop-start traffic, then a tight final approach into a suburban street with parked cars on both sides. That load needs to stay stable through all of it.
The basic loading principles are straightforward:
- Heavy and sturdy first. Large bases, solid cabinets, and major furniture pieces go in first to create stability.
- Weight spread properly. Don't overload one side of the truck.
- Padding between contact points. Wrapped furniture still needs separation where surfaces could rub.
- No loose voids. Empty spaces let items build momentum.
- Straps used with purpose. Secure the load to anchor points, not just around the nearest item.
Why unsecured loads do so much damage
People often assume damage comes from one dramatic event. More often, it's repeated micro-movement. A cabinet shifts slightly on each brake. A table leg taps against another item. A lounge arm rubs through a blanket because there was too much play in the stack.
That problem gets worse on winding roads, steep suburban streets, and driveways where the truck angle changes quickly. It's also common when DIY loads are packed low but loose, with the idea that "it should be right because nothing is stacked too high". If items can move, they will.
A truck load should travel as one stable unit, not as separate pieces hoping not to touch.
Loading for real homes, not ideal conditions
Real jobs involve awkward access and time pressure. In strata buildings, you might need to clear the loading bay quickly. In Newcastle heritage blocks, the carry path might be longer than expected. In Lake Macquarie, the driveway might slope hard enough that ramp handling changes the way heavy pieces enter the truck.
That means the loading plan should be set before the first large item comes out. Know which pieces are going against the wall, which need upright travel, which cannot bear weight, and which items need to be unloaded first because of access at the destination.
If you're weighing up labour-only help or a full relocation service, this article on choosing the right loading services explains what to look for in secure loading, tie-down practice, and truck preparation.
When DIY Isn't Worth the Risk Knowing When to Hire a Professional Removalist
DIY can make sense for a small move with light furniture, easy access, and plenty of time. It usually makes less sense when the furniture is valuable, the property access is awkward, or the move has too many variables to manage calmly on the day.
The hidden cost isn't just damage. It's time off work, extra vehicle hire, hardware lost during disassembly, access windows missed, and the physical toll of lifting heavy furniture through spaces that weren't designed for it.
The jobs that tip toward professional help
If the move involves stairs, lifts, heritage buildings, tight terraces, steep drives, or long carry distances, professional handling becomes much more practical. The same applies if you're moving antique furniture, pianos, large modular lounges, or anything with sentimental value that cannot be easily replaced.
Apartment and strata moves are another common turning point. Lift bookings, body corporate conditions, loading dock timing, shared-area protection, and move-in restrictions can turn a basic furniture move into a tightly managed job. A professional removalist should know how to work within those rules and keep the schedule moving.
A useful way to assess it is to ask yourself:
- What's the consequence if this item gets damaged
- Can I safely carry and control it through every access point
- Do I have enough people, time, and equipment
- What happens if the building or street access doesn't go to plan
Insurance, property protection, and reliability
When you're comparing options, look beyond the truck and labour. Ask about full insurance coverage, public liability, and how the business protects both belongings and property. Floor runners, blankets, doorway protection, and careful loading matter just as much as lifting strength.
Reliability also matters more than many people realise. If a team arrives late to a Sydney apartment booking or misses a loading window in a Newcastle building, the pressure increases immediately. That's when corners get cut and furniture gets rushed. On-time service isn't just convenient. It protects the move.
If you want a clearer idea of where specialist furniture handling adds value, this guide to choosing a furniture removalist on the Central Coast is a helpful reference.
A practical way to decide
If you're moving a few simple pieces from one accessible home to another, DIY may be workable. If you're coordinating a family move from a Wamberal house into a Sydney unit with booked lifts, limited parking, and a mix of timber, upholstered, and oversized furniture, professional support usually pays for itself in reduced risk and smoother timing.
The right removalist won't just carry furniture. They'll plan access, protect the property, manage the load, and keep the relocation moving safely from first item out to final placement.
Frequently Asked Questions About Protecting Furniture
How do I protect furniture for long-term storage
Storage changes the job because the risk isn't only impact. It's moisture, dust, and trapped air. Clean everything first, make sure it's fully dry, then use breathable protective layers rather than sealing delicate items in direct plastic. Timber pieces should be covered in a way that allows airflow, and upholstered furniture should be kept clean and dry with fitted covers.
If you're storing items after a declutter or renovation, decide what you're keeping before you pay to move and store it. For unwanted bulky items, local disposal rules matter, and this guide on whether you can put furniture in a skip is a useful reference point before you book waste removal.
Can I use plastic wrap directly on wood
For most timber furniture, especially antiques or polished finishes, I wouldn't. Direct plastic contact can trap condensation and lead to finish problems in humid coastal conditions. It's much safer to put breathable paper or felt against the wood first, then use blankets, then secure the outside with stretch wrap if needed.
What's the first thing to do if I find damage after the move
Stop unwrapping other pieces and document the issue straight away. Take clear photos from a few angles, keep the packing materials if they're relevant, and note when you found the damage. If a removalist handled the move, contact them promptly and follow their claims process. If you moved the item yourself, inspect whether the damage came from carrying, loading, or moisture so you don't repeat the same problem on anything still in transit or storage.
If you're planning a move across the Central Coast, Sydney, Newcastle or Lake Macquarie and want careful help with furniture protection, packing, access planning, and insured relocation support, Gentle Giant Removals & Relocations can help. You can request a free moving quote, arrange a free in-home assessment, or call for urgent moves if your timing is tight.