
You're usually not thinking about tape dispensers until the night the packing starts. The flat-pack cartons are open, the kitchen still isn't done, and that first cheap roll of tape has already folded onto itself. Around the Central Coast, Sydney and Newcastle, that small bit of kit can make the difference between a clean, organised pack and a long, frustrating weekend.
A good Wrap & Move Tape Dispenser helps you seal cartons properly, keep your hands moving, and avoid the usual DIY packing mistakes. That matters whether you're leaving a house in Terrigal, booking a lift in a Gosford apartment, or working around narrow access and busy traffic in Sydney. It also matters because poorly sealed cartons don't stay neatly stacked once a removalist starts loading around stairs, driveways, shared areas and wet coastal air.
Early in your planning, it also helps to think beyond tape alone. Choosing the right cartons and packing materials saves rework later, especially if you're comparing reusable options like storage boxes for removals with standard cardboard cartons.
Choosing Your Tools for a Successful Pack
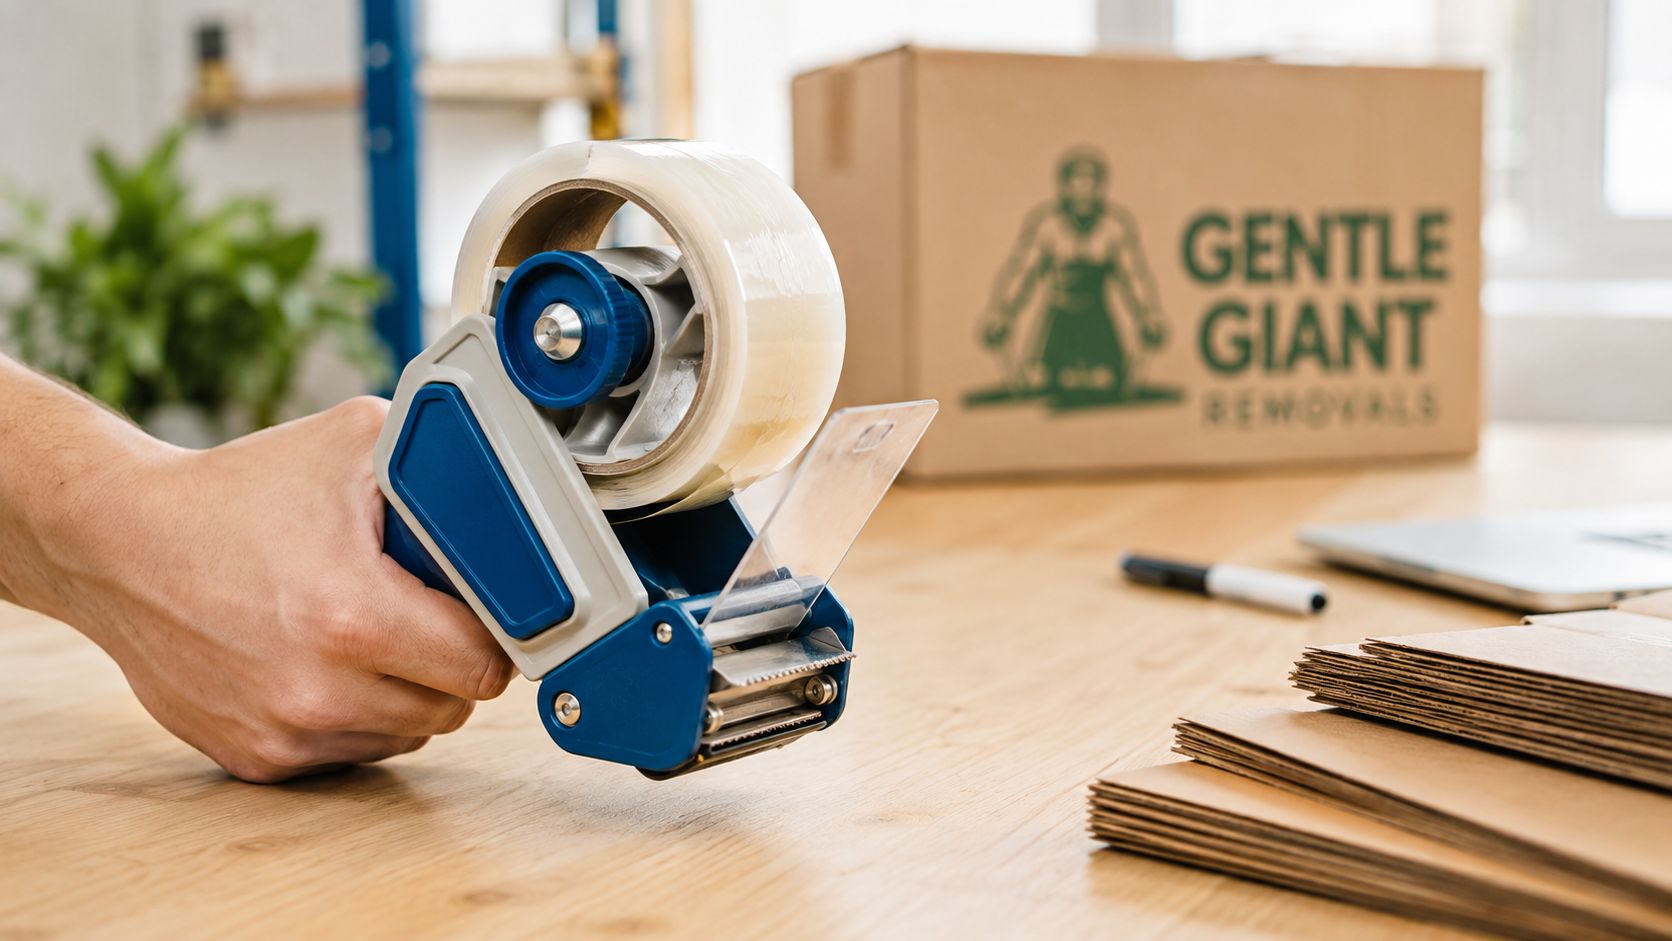
If you're standing in your lounge room in Terrigal with a stack of unbuilt cartons, start with the tool that gets used more than almost anything else. A proper Wrap & Move Tape Dispenser turns sealing boxes into a one-handed job, which leaves your other hand free to steady flaps, hold packing paper in place, or keep a carton square while you work.
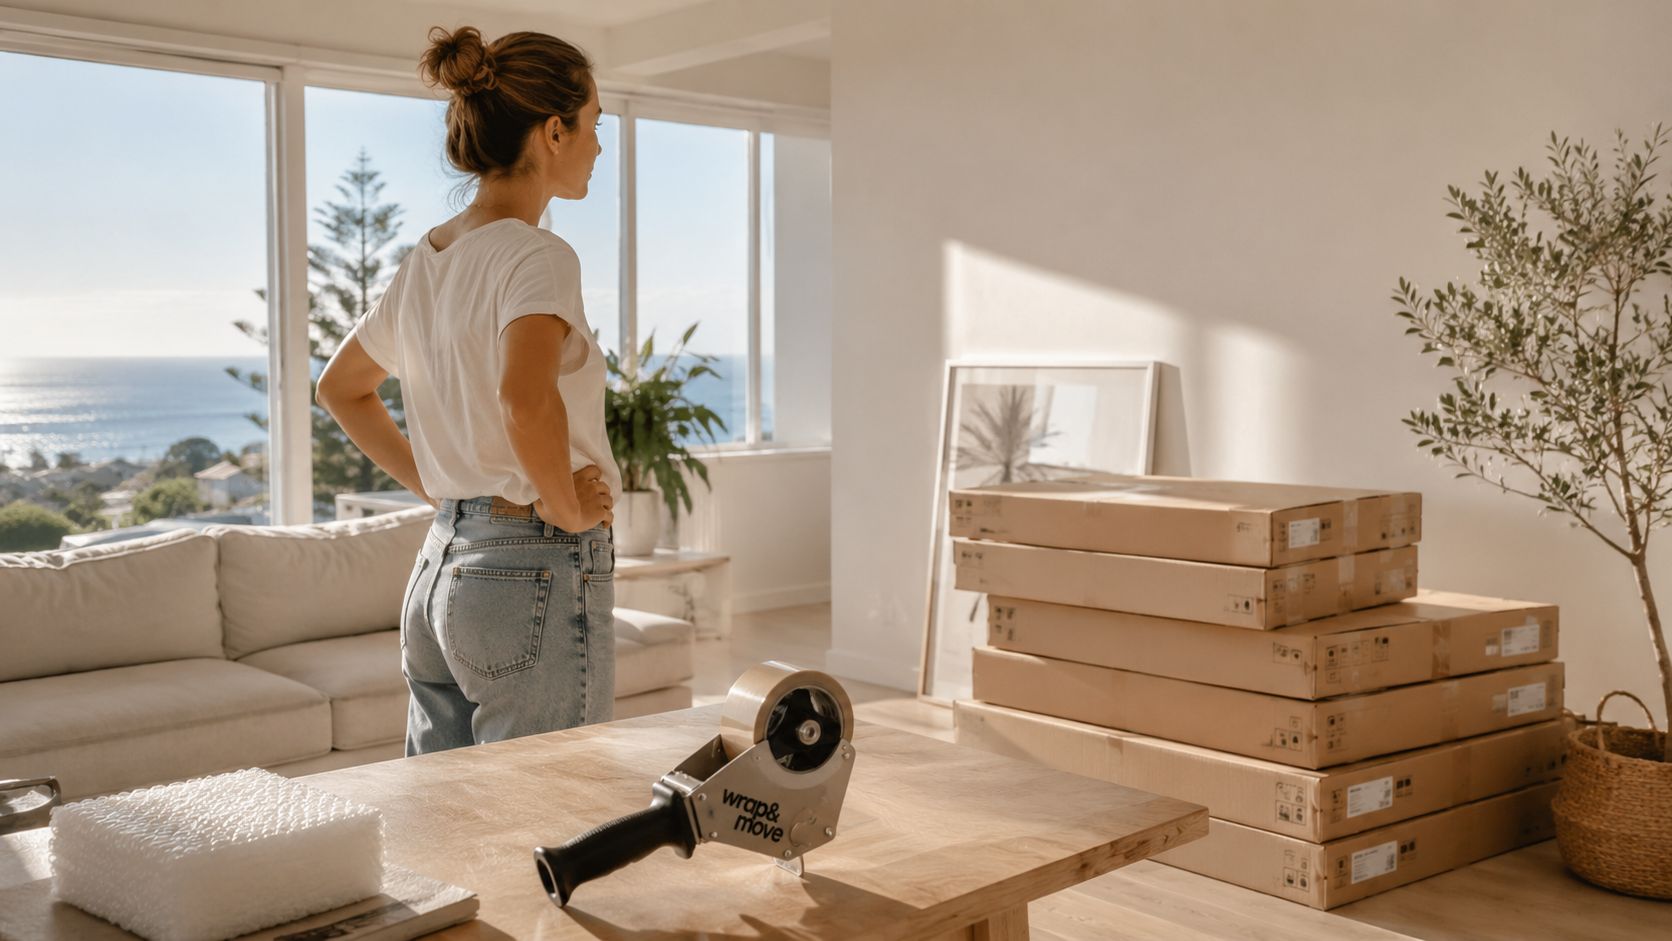
The main features worth looking for are simple. The Wrap & Move Tape Dispenser sold in Australia has a contoured pistol grip, adjustable tension and a safety guard, and it's designed for standard 48mm packing tape, which is the industry standard for Australian packaging operations according to Carewell Group's packing tape dispenser guide. That size matters because it gives you enough coverage across carton seams without becoming awkward on smaller boxes.
What matters most in your hand
The pistol-grip style isn't just about comfort. When you're packing a whole home, repetitive wrist movement adds up fast. A contoured handle gives you better control, especially when you're sealing cartons on the floor, across a bench, or in tighter spaces like apartment corridors and lift lobbies.
The adjustable tension matters for a different reason. If tape spills out too freely, it wrinkles and sticks to itself. If it's too tight, you end up dragging and tearing tape when you want a smooth run. Good tension lets you work quickly without chewing through extra rolls.
Practical rule: Buy the dispenser and tape together if you can. Most DIY packing issues start with a mismatch between a decent dispenser and poor-quality tape.
Pair the dispenser with decent tape
A quality dispenser can't rescue poor tape. You want tape that feeds cleanly, cuts cleanly and grips well enough to stay put once cartons are loaded, stacked and shifted through a truck body.
That's especially important on relocations between the Central Coast and Newcastle or Sydney, where cartons can go from a garage, to a driveway, to a truck, to a unit block loading zone in the same day. If you'd like a broader look at how removal businesses think about packing systems and workflow, this moving company business guide gives useful industry context.
A quick checklist helps when you're buying supplies:
- Choose 48mm tape: It suits the dispenser properly and covers standard carton seams well.
- Check for a safety guard: You'll set the dispenser down constantly while packing room by room.
- Look for adjustable tension: This gives you control when conditions change, especially in coastal suburbs.
- Test before a full packing day: Seal a couple of cartons first so you're not troubleshooting halfway through the kitchen.
How to Load Your Tape Dispenser Correctly
Most tape dispenser problems start before the tape ever touches a box. If the roll goes on the wrong way, the dispenser feels awkward, the tape won't grip properly, and people blame the tool when loading itself is the problem.
This visual is a good reference to keep nearby while you set up.
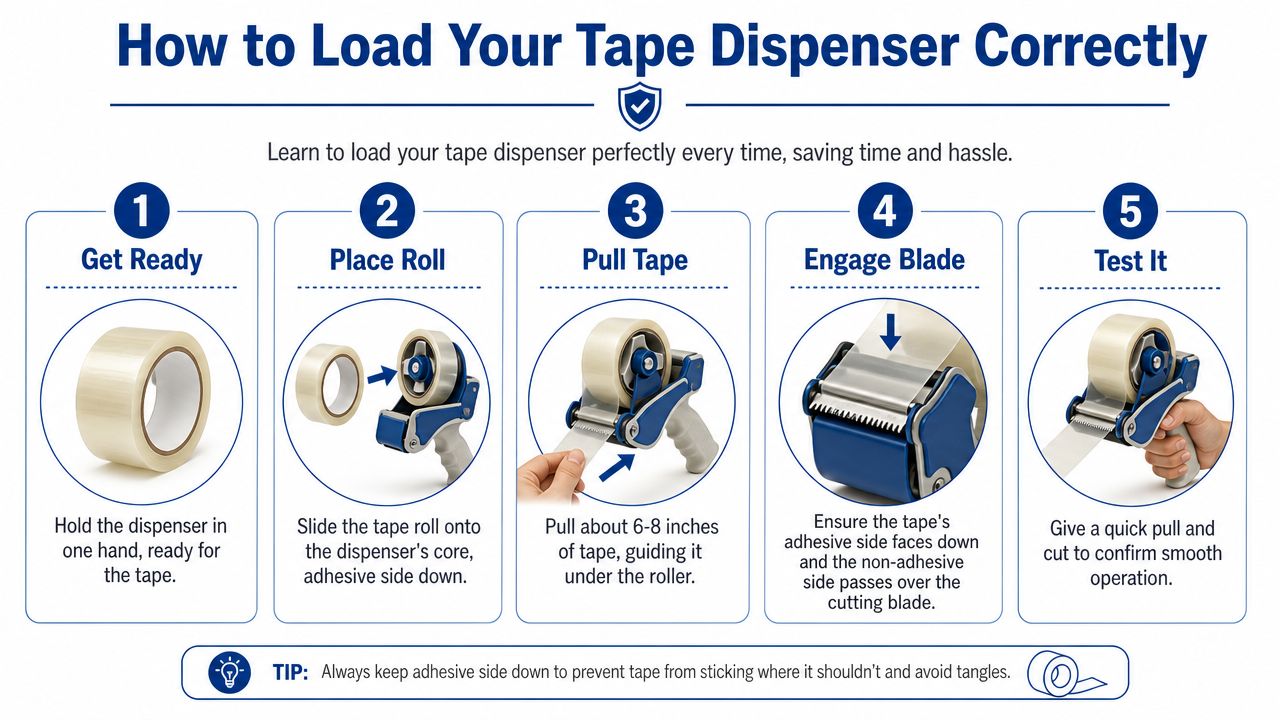
Start by holding the dispenser so the handle sits naturally in your hand. Slide the roll onto the core and pull the tape forward with the adhesive facing down toward the carton surface, not up into the air. Then thread the tape under the roller and forward toward the blade.
The mistake that causes most trouble
Loading tape sticky-side up is the classic error. It looks close enough, so people keep going, but the tape won't bond to the carton the way it should. According to Wrap & Move's product guidance, loading tape with the adhesive facing upward causes 18% seal failure, and using dull blades increases tear incidents by 27%. The same guidance notes that following the standard loading protocol, with tape facing down and threaded under the roller, achieves 98% secure seals.
That's why the setup step matters. A correctly loaded dispenser rolls smoothly, keeps the tape flat, and lets you cut without yanking the carton across the room.
If the dispenser feels clumsy from the first pull, stop and reload it. A properly loaded dispenser should feel predictable almost straight away.
For a quick visual walkthrough, this short demo helps if you prefer to see the motion rather than read it.
A simple loading routine that works
Use this sequence each time you start a new roll:
- Seat the roll properly: Make sure it sits firmly on the core and doesn't wobble.
- Check tape direction: The adhesive side should face down toward the carton.
- Feed under the roller: This creates the right path and keeps pressure on the tape.
- Pull a short lead: Bring enough tape forward to pass cleanly over the blade area.
- Test on one spare carton: A short run tells you instantly whether it's loaded right.
If you're gathering supplies before packing day, it helps to keep the dispenser, tape, labels and paper together rather than hunting room by room. This guide to packing supplies near me is useful if you're sourcing materials locally around the Central Coast.
Taping Boxes Like a Professional Removalist
A single strip across the middle of a box looks finished. It often isn't. Once that carton is lifted, stacked, turned sideways through a stairwell, or loaded in with heavier items nearby, the weak points show up fast.
That's why removalists don't rely on one line of tape. We use a method that reinforces the main stress points, especially on cartons carrying pantry items, books, small appliances or mixed household goods.
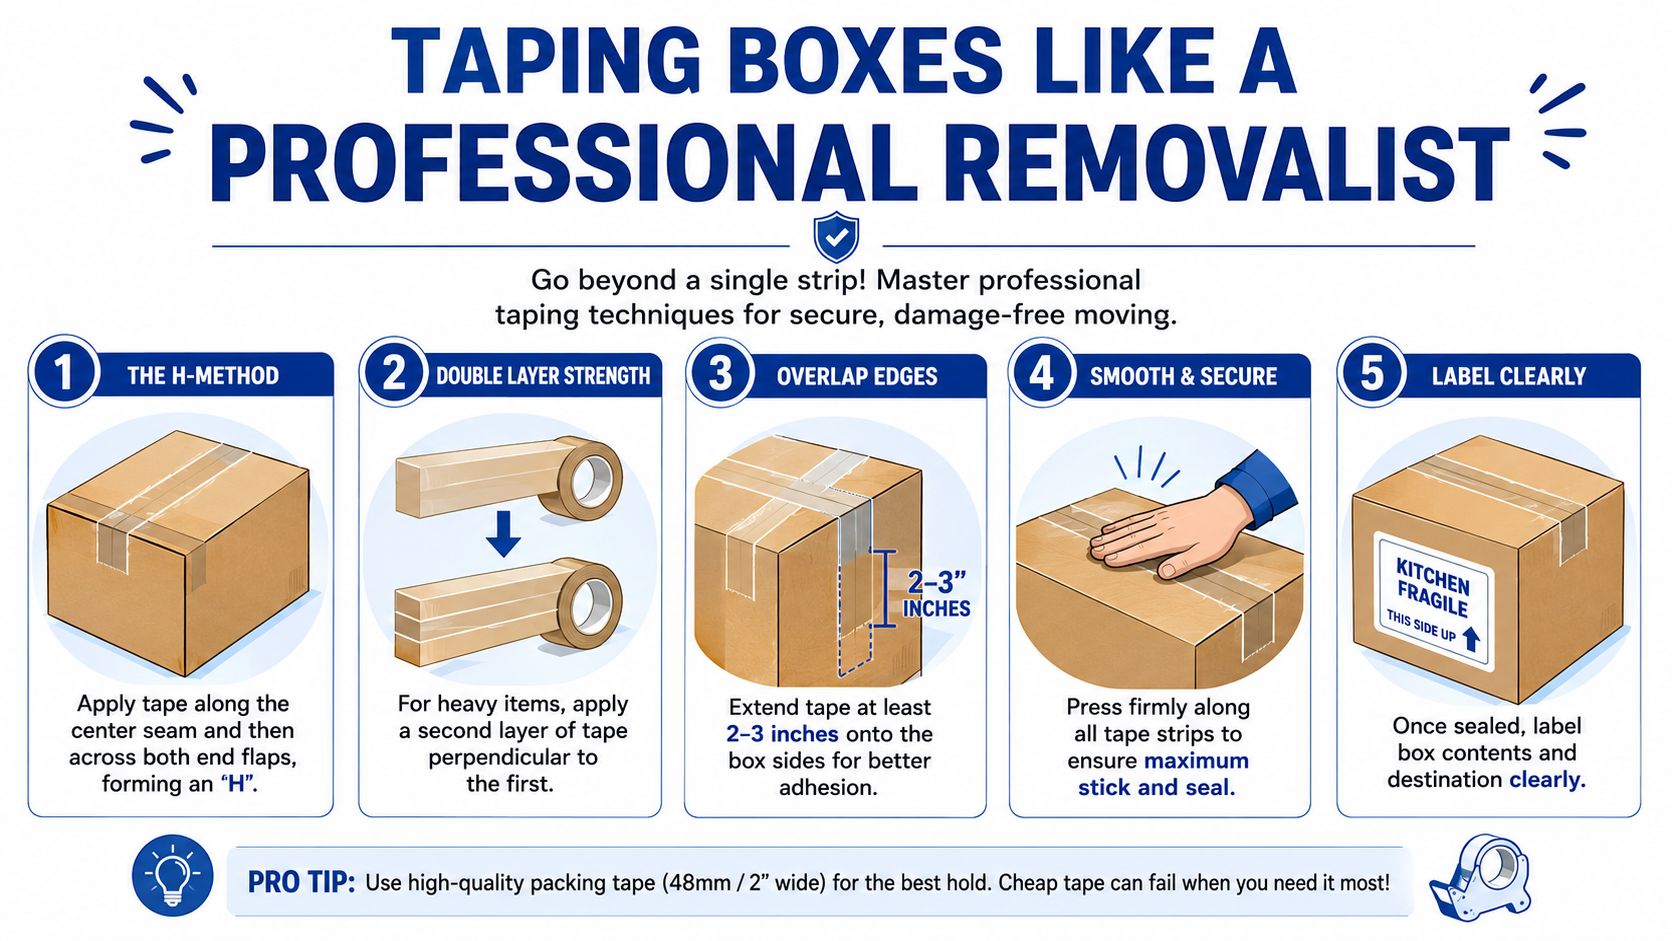
Use the H-tape method
The H-tape method is straightforward. Run one strip down the centre seam where the flaps meet. Then run a strip across each short edge. When you're done, the tape pattern looks like an H.
That shape matters because it supports all the flap joins, not just the middle. On a relocation from a house in Bateau Bay to a heritage apartment in Newcastle, for example, cartons may be carried through tighter hallways and shared entries before they ever reach the truck. Better sealing keeps the base and lid from flexing open when the carton is handled repeatedly.
For heavier cartons, add another layer where needed rather than hoping one pass will do the job. Books, tools and pantry staples usually need more reinforcement than linen or clothing.
Adjust tension for coastal humidity
Local conditions change the job. Generic dispenser guides usually tell you to tighten the tension if tape unwinds too quickly. That advice is incomplete for coastal NSW.
According to Stylus Tapes' guide on tape dispenser use, there's a lack of region-specific advice for high-humidity Central Coast conditions, and Australia's coastal humidity averages 70-80% in Newcastle and Sydney, which can soften standard 48mm packaging tape and cause slippage or jamming. In practice, that means a setting that feels fine inland can feel too loose near the coast.
On humid days around the Central Coast, a slightly firmer tension setting usually gives you a flatter, cleaner run of tape.
Don't over-correct. If the tape starts dragging hard, shredding, or pulling the carton flap upward, the tension is too tight. You want the tape taut but not stretched.
Press the tape like you mean it
The dispenser lays the tape down. Your hand finishes the seal. After each strip, run your palm along the tape to press it firmly onto the carton surface, particularly near the edges and corners. That extra pressure helps the adhesive bond properly, which is useful when cartons have been stored in a garage, picked up moisture from coastal air, or gathered dust during pre-move sorting.
Good taping also helps with fragile-item packing. Strong box seams support the cushioning inside, so the carton doesn't deform around glassware, ceramics or framed pieces. If you're working through breakables room by room, this guide on how to pack fragile items for moving is worth keeping open while you pack.
Safety and Maintenance for Your Dispenser
A tape dispenser looks harmless until you catch the blade with a fingertip while rushing through the last few cartons. The blade is sharp for a reason, so safe handling has to become habit early.
Small safety habits that prevent silly injuries
Keep your fingers clear of the blade path when you cut. Don't leave the dispenser loose on a couch, bed or carton top where someone else can grab it blindly. If your dispenser has a safety guard, use it every time you set the tool down.
Always engage the safety guard when you set the dispenser down. That one habit prevents a lot of avoidable cuts during busy packing days, especially when family members are helping, children are nearby, or you're packing in shared apartment areas where things get put down and picked up constantly.
A tape dispenser should never be left blade-first on a box lid or bench edge.
Keep it clean so it keeps working
Adhesive residue builds up on rollers and around the cutting area over time. When that happens, tape starts dragging, twisting or bunching before it reaches the carton. A quick wipe-down helps the dispenser feed cleanly again.
Check the blade as well. If cuts start looking ragged, don't force the tool through the next dozen cartons. Clean it first, and if the edge is worn, replace the dispenser or blade if the model allows it. Reliable packing always comes back to using tools that work properly, especially if you're doing a full-house pack over several days.
If you're weighing up whether to keep packing yourself or hand the whole job over, it's worth comparing your time, access conditions and the number of fragile items involved. This overview of packing and removal services helps frame that decision.
Common Taping Problems and Quick Fixes
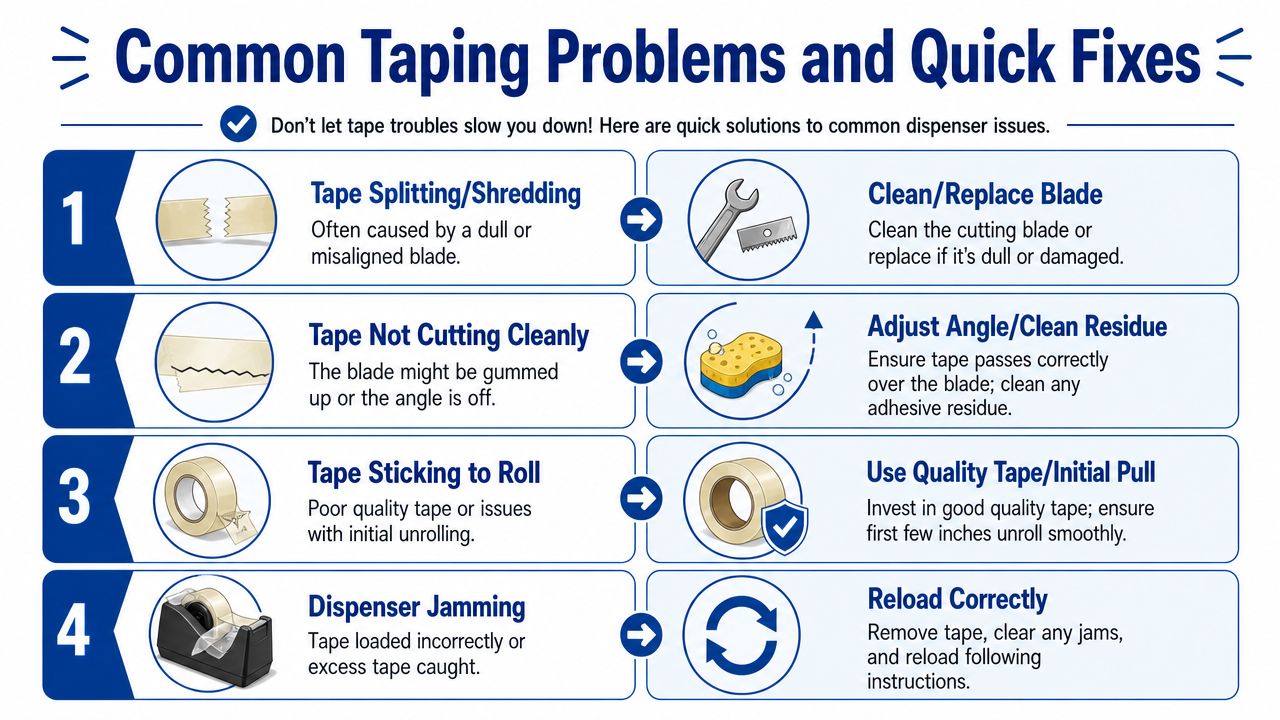
Even a decent Wrap & Move Tape Dispenser can play up if the tape is poor, the blade is dirty, or the settings are off for the conditions. The good news is that most issues are quick to sort once you know what you're looking at.
Match the problem to the cause
Here's a simple reference table for the faults we see most often during DIY packing days.
| Problem | Likely cause | Quick fix |
|---|---|---|
| Tape keeps splitting | Dull blade or poor tape | Try a better roll first, then inspect the blade |
| Tape won't cut cleanly | Residue on blade or wrong tape path | Clean the blade area and check the tape path |
| Tape won't stick well | Dusty carton surface or damp conditions | Wipe the carton dry and press tape down firmly |
| Tape keeps jamming | Tension too tight or roll loaded poorly | Remove the roll, clear the jam, reload carefully |
Don't ignore the box surface
People often focus on the dispenser and forget the carton itself. If the cardboard is dusty, slightly damp, or has been sitting open in a garage near the coast, the adhesive won't bond as cleanly. A dry cloth over the seam area before taping fixes more sticking issues than generally anticipated.
If the tape keeps tangling, loosen the tension slightly. If it spills out too freely and folds back on itself, tighten it a touch. Small adjustments work better than dramatic ones.
When tape problems keep repeating on every carton, stop troubleshooting the symptom and change one variable at a time. First the tape roll, then the blade, then the tension.
Packing Smart for Your Central Coast Move
Sealing a carton properly is a small task, but it sits inside a much bigger moving plan. A relocation around the Central Coast, Sydney, Newcastle or Lake Macquarie usually involves access, timing and building rules as much as packing technique.
If you're moving out of a Gosford unit or into an apartment in Newcastle, check strata and body corporate requirements early. Some buildings want lift bookings, protection for shared areas, proof of insurance, or limits on move-in times. In Sydney, parking restrictions and loading access can add another layer, especially on busy streets where the truck can't pull up directly out front. If you're in a narrow street, a steep driveway, or a complex with limited turning space, that affects the relocation plan as much as the number of cartons does.
DIY packing can suit some households well, particularly if you're organised and starting early. But if you're juggling work, children, settlement dates or an interstate relocation, professional packing often becomes the safer option for fragile items, artwork, kitchenware and anything awkward to protect. It also helps when stairs, lifts and access delays compress the moving day.
Insurance is another area where details matter. In Australia, most professional removalists offer basic released value cover that compensates $0.60 per pound or $1.32 per kg for lost or damaged items, while Full Value Protection covers the full replacement value of high-value belongings, as explained in this moving insurance guide. If you're relocating valuable furniture, antiques, instruments or a carefully packed home office, that difference matters.
For interstate planning and the extra logistics that come with a longer run, this guide on a Sydney to Central Coast removalist is a useful next read.
The practical approach is simple. Use the right tape dispenser, seal cartons properly, label clearly, and get help where the risks rise. That includes fragile items, high-value goods, difficult access, or tight schedules during holiday periods and wet weather.
If you'd like experienced help with packing, access planning or a full home or office relocation, Gentle Giant Removals & Relocations can help across the Central Coast, Lake Macquarie, Newcastle and Sydney. You can get a free moving quote or request a free in-home assessment to work out what level of support suits your move. For urgent relocations or last-minute packing help, call the team directly and we'll help you plan the safest, most practical next step.